How to Grow Garlic in Containers Philippines: Your Complete Urban Farming Guide
Let’s be honest. The scent of fresh garlic sautéing in oil is practically a national aroma in Philippine kitchens. It’s the unsung hero of adobo, the essential punch in sinigang, and the soul of countless sinasa. But what if you could step onto your balcony, patio, or even a sunny windowsill and pluck that very ingredient yourself? No vast farmland required. Just a few containers, some know-how, and the tropical grit to make it happen.
Welcome to the practical, no-nonsense guide on how to grow garlic in containers Philippines. This isn’t recycled advice from temperate climates. This is for the Filipino gardener dealing with intense sun, unpredictable monsoons, and city-space constraints. We’re turning those limitations into your greatest advantage. Forget waiting for the next grocery trip or worrying about imported, sometimes questionable quality. It’s time to embrace container gardening Philippines style and secure your own stash of potent, homegrown garlic.
Why Grow Garlic in Containers Here and Now?
Before we dig into the how, let’s establish the why. This isn’t just a hobby; it’s a smart move.
- Space is No Excuse: Live in a condo in Makati, a townhouse in Cebu, or a home with a small yard in Davao? A container garden thrives on balconies, verandas, and even sunny corridors. Urban farming in the Philippines has exploded for a reason—we maximize every square inch.
- Control is Power: The Philippine climate is… enthusiastic. One day it’s scorching, the next it’s pouring. Growing in pots means you can move your garlic. Avoid waterlogged soil during a typhoon. Provide afternoon shade during a habagat heatwave. You become the climate manager.
- Pest & Disease Management: Soil-borne diseases that linger in garden beds are largely avoided. You start with a fresh, sterile medium. It’s a clean slate, making homegrown garlic healthier from the start.
- The Freshness Factor: Nothing compares to garlic harvested moments before use. The flavor is brighter, more complex, and fiercely aromatic. Store-bought bulbs have often been in storage for months. Your container-grown garlic is the peak of freshness.
- Food Security & Cost: With the price of basic commodities fluctuating, growing your own garlic is a direct act of self-reliance. A few bulbs planted can yield a harvest that covers your kitchen needs for months.
This guide will walk you through every single step, tailored for Philippine conditions. Let’s get our hands dirty.
Section 1: The Foundation – Choosing the Right Garlic for the Philippines
This is the single most critical decision you’ll make. Not all garlic is created equal, and planting the wrong type is the #1 reason for failure here.
The Hardneck vs. Softneck Divide:
- Hardneck Garlic: Produces a central flower stalk (scape). It’s cold-hardy, has large, flavorful cloves, but has a shorter storage life (3-4 months). Generally NOT recommended for lowland PH.
- Softneck Garlic: No central stalk. It’s heat-tolerant, has more cloves per bulb, and stores exceptionally well (up to a year). This is your champion for container gardening in the Philippines.
The Photoperiod Puzzle (Day Length): Garlic bulb formation is triggered by day length.
- Long-Day Types: Need 14+ hours of daylight to form bulbs. Suited for northern latitudes. Avoid these.
- Intermediate-Day Types: Need 12-14 hours. Can work in some higher altitude areas of the PH (like Benguet or Tagaytay).
- Short-Day (or Day-Neutral) Types: Need only 10-12 hours of daylight to initiate bulbing. THIS IS YOUR TARGET. These are perfect for tropical conditions where day length doesn’t vary drastically.
Where to Get the Right Planting Stock (The “Seed Garlic”):
- Local Farmers & Markets: Your best bet. Visit agricultural markets in your area. Talk to vendors. Look for small, firm, healthy bulbs from the last harvest. Often, these are varieties already adapted to your specific regional microclimate. Ask: “Anong klaseng bawang ito? Madali ba Bulan sa tag-ulan?” (What kind of garlic is this? Does it bulb easily in the rainy season?)
- Online Sellers (with caution): Some Filipino gardening groups on Facebook sell locally-sourced planting cloves. Be wary of sellers offering “Italian” or “California” varieties—they’re almost certainly long-day and will disappoint.
- From Your Own Harvest: Once you succeed, save your largest, healthiest bulbs for planting next season. This is the pinnacle of self-sufficiency.
Key Takeaway: Your mission is to find short-day or day-neutral softneck garlic that is either from a Philippine source or proven to perform in tropical/subtropical zones. Think of the common white-skinned, multiple-cloved varieties sold in local markets. These are often the right type.
Section 2: Containers & Soil – Setting Up for Success
You wouldn’t build a house on a shaky foundation. Don’t grow garlic in a random pot with garden soil.
The Perfect Container:
- Depth is Non-Negotiable: Garlic needs space for its root system and developing bulb. Minimum depth: 12 inches (30 cm). Deeper (15-18 inches) is even better.
- Drainage is Law: Every single pot MUST have adequate drainage holes. No exceptions. Drill more if needed. Waterlogged roots = rotted bulbs.
- Material & Size:
- Terracotta/Clay: Excellent breathability, dries out quickly (good in rainy areas). Can dry out too fast in intense sun—monitor closely.
- Plastic/Fabric Pots: Retain moisture longer (good in very hot, dry spells). Ensure they are UV-stable if placed in full sun.
- Size: A pot with at least a 10-12 inch diameter (25-30 cm) can hold 3-4 cloves comfortably. A 5-gallon (19L) container is a sweet spot.
- Pro Tip: Use food-grade containers (like large, clean, food-grade plastic buckets) if sourcing creatively. Avoid anything that held toxic chemicals.
The Gold Standard Soil Mix: Forget using plain garden soil (madumi, magdudulot ng sakit) or even plain potting mix. You need a light, fertile, well-draining blend.
Recommended DIY Mix Recipe (per 5-gallon pot):
- 40% High-Quality Potting Mix (base)
- 30% Coarse Coconut Coir (holds moisture but doesn’t compact, sustainable PH resource)
- 20% Perlite or Pumice (critical for drainage and aeration)
- 10% Well-Rotted Compost or Organic Fertilizer (for slow-release nutrients)
Mix it all thoroughly. This blend prevents compaction in heavy rains, drains excess water quickly, yet retains enough moisture between waterings. It’s the ideal environment for garlic cloves to sprout and swell.
Section 3: Planting – Timing and Technique for Philippine Seasons
Timing is everything in Philippine climate gardening. Garlic has a long growing season (4-8 months), so you must plant it to avoid the peak of the monsoon and extreme heat.
The Ideal Planting Windows:
- For Most Lowland Areas (Manila, Cebu, Iloilo, etc.):
- Primary Season: Late September to Early November. This plants for a harvest in February to April. The plants establish in the cooler, drier months, go through the cooler period (Nov-Feb), and bulb just as the dry season starts. This is your best and most reliable window.
- Secondary Season: Late February to Early March. Plants grow through the hot, dry season and are harvested June to July. This is riskier due to extreme heat and requires vigilant watering. Bulbs may be smaller.
- For Cooler High-Altitude Areas (Tagaytay, Baguio, Bukidnon):
- You have more flexibility. Planting can start as early as August for a Dec-Jan harvest, or October/November for a March-April harvest.
Step-by-Step Planting Process:
- Prepare the Cloves: A few days before planting, separate your garlic bulb into individual cloves. DO NOT PEEL. The papery skin must stay on to prevent rot and deter pests. Choose only the largest, healthiest, undamaged cloves for planting. The tiny inner cloves can be used in the kitchen.
- Pre-Plant Soak (Optional but Recommended): Soak the cloves for 1-2 hours in water mixed with a teaspoon of baking soda and a drop of liquid organic fertilizer (like seaweed or fish emulsion). This helps prevent fungal diseases.
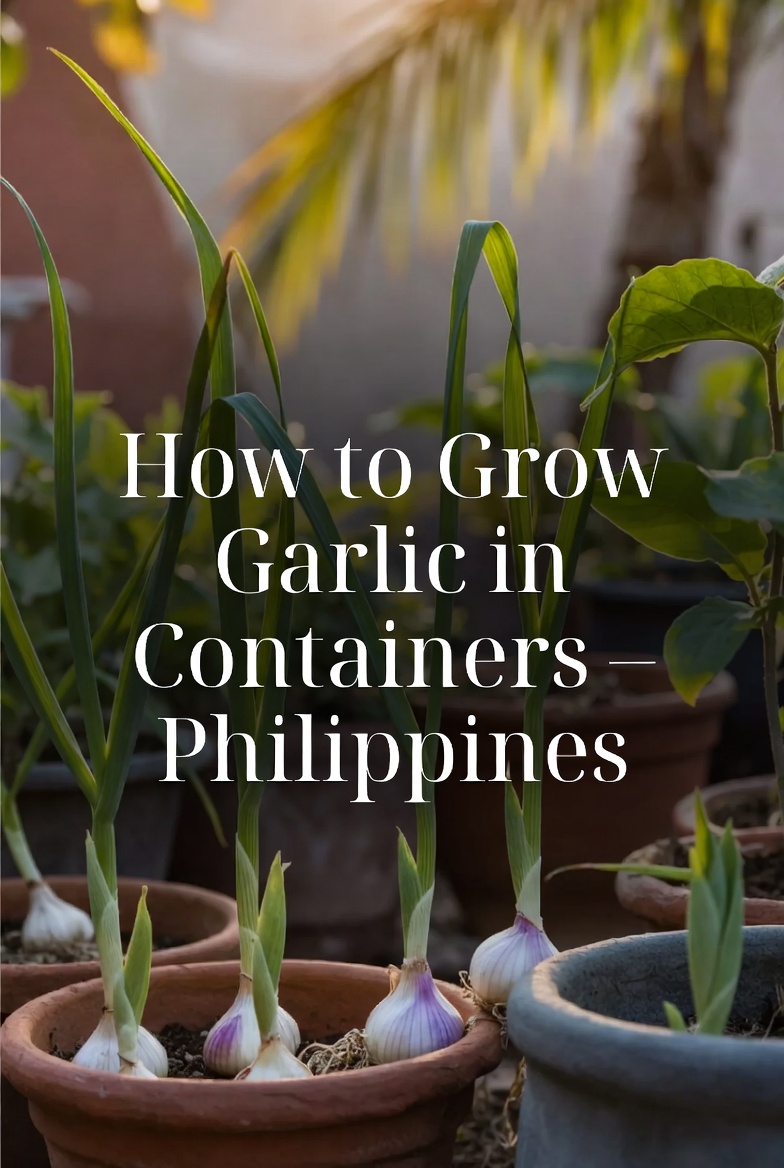
- Planting Depth & Orientation: Fill your prepared container with your soil mix, leaving 2 inches from the rim. Make holes 2-3 inches deep (5-7.5 cm). Pointy end UP, flat root end DOWN. Space cloves 4-6 inches apart (10-15 cm) in all directions.
- Cover and Water: Gently fill the holes with soil, firming lightly. Water thoroughly but gently until water runs out the drainage holes. This initial soak is crucial.
- Label: Seriously. Label your pot with the date and garlic type. You’ll thank yourself in 6 months.
Patience is Required: You won’t see green shoots for 1-3 weeks, sometimes longer. This is normal. The clove is first establishing its root system underground.
Section 4: The Growing Season – Care, Water, and Food
This is the long haul. Your role is to be a steady, observant manager.
Sunlight Requirements: Garlic needs full sun—at least 6-8 hours of direct sunlight. In the brutal lowland Philippines afternoon sun (silangan araw sa bahagi ng hapon), some afternoon shade (from a tree, netting, or moving the pot) during the hottest months (March-May) can prevent the leaves from scorching.
Watering – The Tightrope Walk:
- The Rule: Keep the soil consistently moist, never soggy, never bone-dry. Think of a wrung-out sponge.
- How to Check: Insert your finger 2 inches into the soil. If it’s dry, water deeply until it runs out the bottom.
- Philippine Nuance:
- Rainy Season: Your pots under a roof will need regular watering. Pots under open sky may need protection from excessive downpours to prevent rot. Move them!
- Dry Season: Daily or even twice-daily watering may be needed, especially for smaller pots. Mulch heavily (see next point).
- Water at the base, not over the leaves, to reduce fungal risk. Morning watering is ideal.
Mulching – Your Secret Weapon: Apply a 2-3 inch layer of organic mulch on top of the soil after the shoots are 6 inches tall.
- Best Mulches for PH: Dried coconut leaves (sawali), shredded banana trunk, rice straw, or dried leaves.
- Benefits: Conserves soil moisture (critical in dry season), suppresses weeds, cools the root zone in heat, and as it breaks down, adds organic matter to the soil.
Fertilizing – Feeding Your Future Bulbs: Garlic is a moderate feeder.
- At Planting: Your soil mix with compost should suffice.
- When Greens are 6-12 inches tall: Side-dress with a nitrogen-rich organic fertilizer. Options: ** compost tea, liquid seaweed/fish emulsion (diluted), or a sprinkle of pelletized organic chicken manure** ( watered in well).
- When Bulbing Begins (neck starts to thicken, about 2-3 months before harvest): STOP NITROGEN. Switch to a phosphorus and potassium-rich fertilizer to promote bulb growth. Use wood ash (a PH-friendly source of potassium) lightly scratched into the topsoil, or a liquid fertilizer higher in potassium (like a fruiting fertilizer).
- Frequency: Fertilize every 3-4 weeks during the active growth phase (green tops).
Weeding & Scape Removal:
- Weeds: Pull any weeds immediately. They compete for water and nutrients.
- Scapes (for Hardnecks only): If you accidentally planted a hardneck (or a hybrid), you’ll see a curly flower stalk emerge. Cut it off about 1-2 weeks after it unfurls. This directs the plant’s energy into the bulb, not a flower. (Most pure softnecks won’t send scapes).
Section 5: Harvesting, Curing, and Storing Your Philippine Garlic
Get this part wrong, and you waste months of work.
Knowing When to Harvest:
- Visual Cue: The lower 3-4 leaves will turn yellow and dry, then brown. The top 5-6 leaves should still be somewhat green. Think of it as the plant starting to die back naturally.
- The “Pull Test”: Gently dig away a little soil near one bulb. If the Bulb looks full and the wrapper is tight, it’s time. Do not wait until the entire plant is brown and dead in the ground.
- Timeline: From planting, expect harvest in 4-6 months (for Nov planting, harvest in March-May).
Harvesting Technique:
- Do not pull by the stem! Use a dibble stick or garden fork to gently loosen the soil around and under the bulbs.
- Lift the entire plant carefully. Brush off loose dirt. Do not wash with water.
- Handle gently. They are fragile when freshly dug.
Curing – The Most Important Step: Curing dries the outer wrappers and necks, sealing the bulb for long storage.
- Bundle 5-10 plants by their stems.
- Hang upside down in a dark, dry, well-ventilated area. A shaded carport, a garden shed with windows, or under a nipa roof is perfect. Think BOHO (Breathe, Open, High, Off the ground).
- Cure for 2-4 weeks. The leaves and roots should be completely dry and papery, and the neck should be tight.
- Alternative: Lay the bulbs in a single layer on slatted shelves or mesh racks in the same conditions.
Trimming & Storage:
- Once cured, trim the roots to about ¼ inch. Do not cut the stem/stalk if you want to braid them (classic suyod style storage). If not, cut the stem about 1 inch above the bulb.
- Store in cool (15-20°C), dark, dry, and well-ventilated conditions. A rattan basket (kaon), a mesh bag, or braided strands hung in a kitchen are traditional and effective.
- Do not store in the refrigerator (causes sprouting) or in plastic bags (traps moisture, causes rot).
- Properly cured and stored homegrown garlic can last 6-12 months.
Section 6: Troubleshooting Common Problems in Philippine Conditions
- Yellowing Leaves: Could be overwatering (root rot), underwatering, or a nitrogen deficiency. Check soil moisture first. Adjust watering. If older leaves yellow first, suspect nitrogen; feed lightly.
- Bulbs are Small/Skirted: Usually due to short growing season (planted too late), lack of nutrients (especially potassium at bulbing stage), or severe heat/drought stress during bulbing.
- Mold/Fungus on Bulbs/Soil: Almost always due to poor drainage and excessive moisture. Improve your soil mix. Ensure pots drain freely. Increase airflow around plants. Use neem oil spray as a preventative.
- Pests (Thrips, Mites, Leaf Miners): Blast leaves with a strong jet of water from your hose. Apply neem oil spray (2 tbsp neem oil + 1 tsp liquid soap + 1L water) every 7-10 days. Keep plants healthy—stressed plants attract pests.
- Bulb Rot (Soft, Smelly Bulbs): A classic sign of overwatering and poor drainage during the bulbing stage. Improve drainage statically. During heavy rains, move pots under cover.
Section 7: Beyond the Bulb – Maximizing Your Garlic Experience
- Eat the Scapes: If you get a hardneck, don’t waste the scapes! Chop and sauté them. They have a fantastic, mild garlic-chive flavor. Great for pestom or ginisang gulay.
- Green Garlic: You can harvest early! If you pull a garlic plant before the bulb fully forms (about 60 days after planting), you get “green garlic”—tender, mild, and delicious, like a scallion with garlic flavor. Fantastic for sinigang or as a garnish.
- Using Your Harvest: Your homegrown garlic will be more pungent and flavorful than store-bought. You may need to use slightly less in recipes. Roast whole heads for a sweet, spreadable paste. Make your own garlic powder by slicing and dehydrating cloves.
FAQs: Quick Answers to Your Garlic Questions
Q: Can I use regular store-bought garlic to plant in the Philippines? A: Sometimes, but with caveats. Most imported garlic (often from China) is long-day and treated to prevent sprouting. Look for local, organic-looking, small-to-medium bulbs at the market. Your safest bet is always garlic known to be from a local farmer or a short-day variety.
Q: My garlic leaves are turning yellow and dying early. What’s wrong? A: Check your watering. In the dry season, underwatering is likely. In the rainy season, it could be overwatering and root rot. Also, it might simply be natural senescence if it’s getting close to your expected harvest time (check the calendar from your planting date).
Q: How often should I water my garlic in pots during the summer? A: In the intense lowland heat (tag-init), small to medium pots may need water every day, even twice a day, especially if in full sun. The key is the finger test. Stick to the “wrung-out sponge” moisture level. Mulch heavily!
Q: My garlic bulbs are very small. How can I get bigger ones next season? A: 1) Plant earlier in the recommended season (Sept-Oct). 2) Ensure you’re feeding with potassium-rich fertilizer as bulbs start forming. 3) Use the largest cloves for planting. 4) Ensure pots are deep enough (12+ inches). 5) Give maximum possible sunlight.
Q: Can I grow garlic year-round in containers? A: Technically yes, but it’s not ideal. The plant needs a cooler period (our Nov-Feb) for optimal bulbing. Continuous planting will give you a staggered harvest, but the quality and size may vary. Sticking to the two main seasons yields the best results.
Q: What’s the best companion plant for garlic in containers? A: Garlic is a great companion! It deters pests. In larger containers, you can interplant with tomatoes, peppers, or eggplants (they like similar conditions). Roses also benefit from garlic’s pest-repellent nature. Avoid planting near beans or peas.
Final Word: Your Garlic Journey Starts Now
Learning how to grow garlic in containers Philippines is more than just a gardening guide. It’s a lesson in patience, observation, and working with our unique climate, not against it. It connects you to a fundamental ingredient in your cuisine in the most profound way—from your own hands to your kalan.
That first time you crush a clove from your own harvest, you’ll understand. The aroma is sharper, the flavor is deeper, and the satisfaction is absolute. It’s the taste of self-reliance, grown on a balcony in Manila or a patio in Davao.
So, source those short-day cloves. Get your pots and your coconut coir mix. Plant at the right time. And get ready. In a few months, you won’t just be cooking with garlic. You’ll be cooking with your garlic. That’s a level of sariwa no supermarket can ever match.
Start your container garden. Grow your own. Taste the difference.